Quantitative Polymerase Chain Reaction (qPCR) is a crucial technique in molecular biology for measuring DNA and RNA quantities, with primer design playing a key role in its success. To start, it’s important to grasp the difference between qPCR and conventional PCR; while the latter focuses on amplifying visibly large segments of DNA, qPCR targets shorter amplicons of about 90-150 bp for accurate quantification. Several factors demand attention during primer design—melting temperature (Tm), GC content, and amplicon length are vital parameters to ensure efficient binding and amplification. Additionally, utilizing online design tools like NCBI Primer-BLAST can help identify specific primers while avoiding common issues like secondary structures or non-specificity for better experimental outcomes.
Understanding Primer Basics
 Credits: labxchange.org
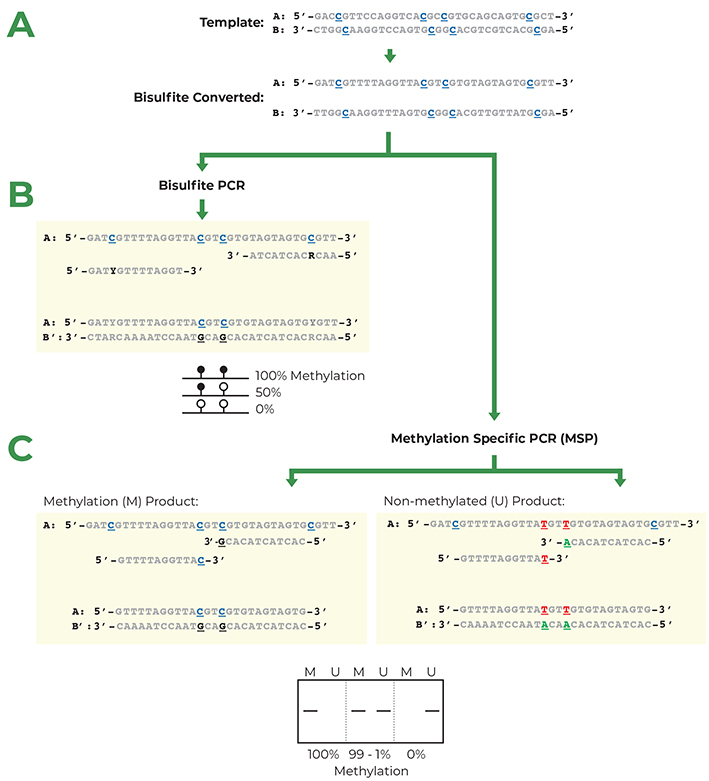
QPCR primers are crucial for the success of quantitative PCR. They are short sequences that initiate the DNA synthesis process. In a typical qPCR setup, two primers are used: a forward primer that binds to the target DNA strand and a reverse primer that binds to the complementary strand. This pairing is essential; if the wrong strand is used, the amplification will not be successful. Furthermore, the design of primers is influenced by the type of PCR being performed. qPCR typically requires smaller amplicons, around 90-150 base pairs, which allows for more precise quantification of the target DNA or RNA. Understanding these basics is the first step in crafting effective primers that yield reliable qPCR results.
Key Design Considerations
 Credits: zymoresearch.com
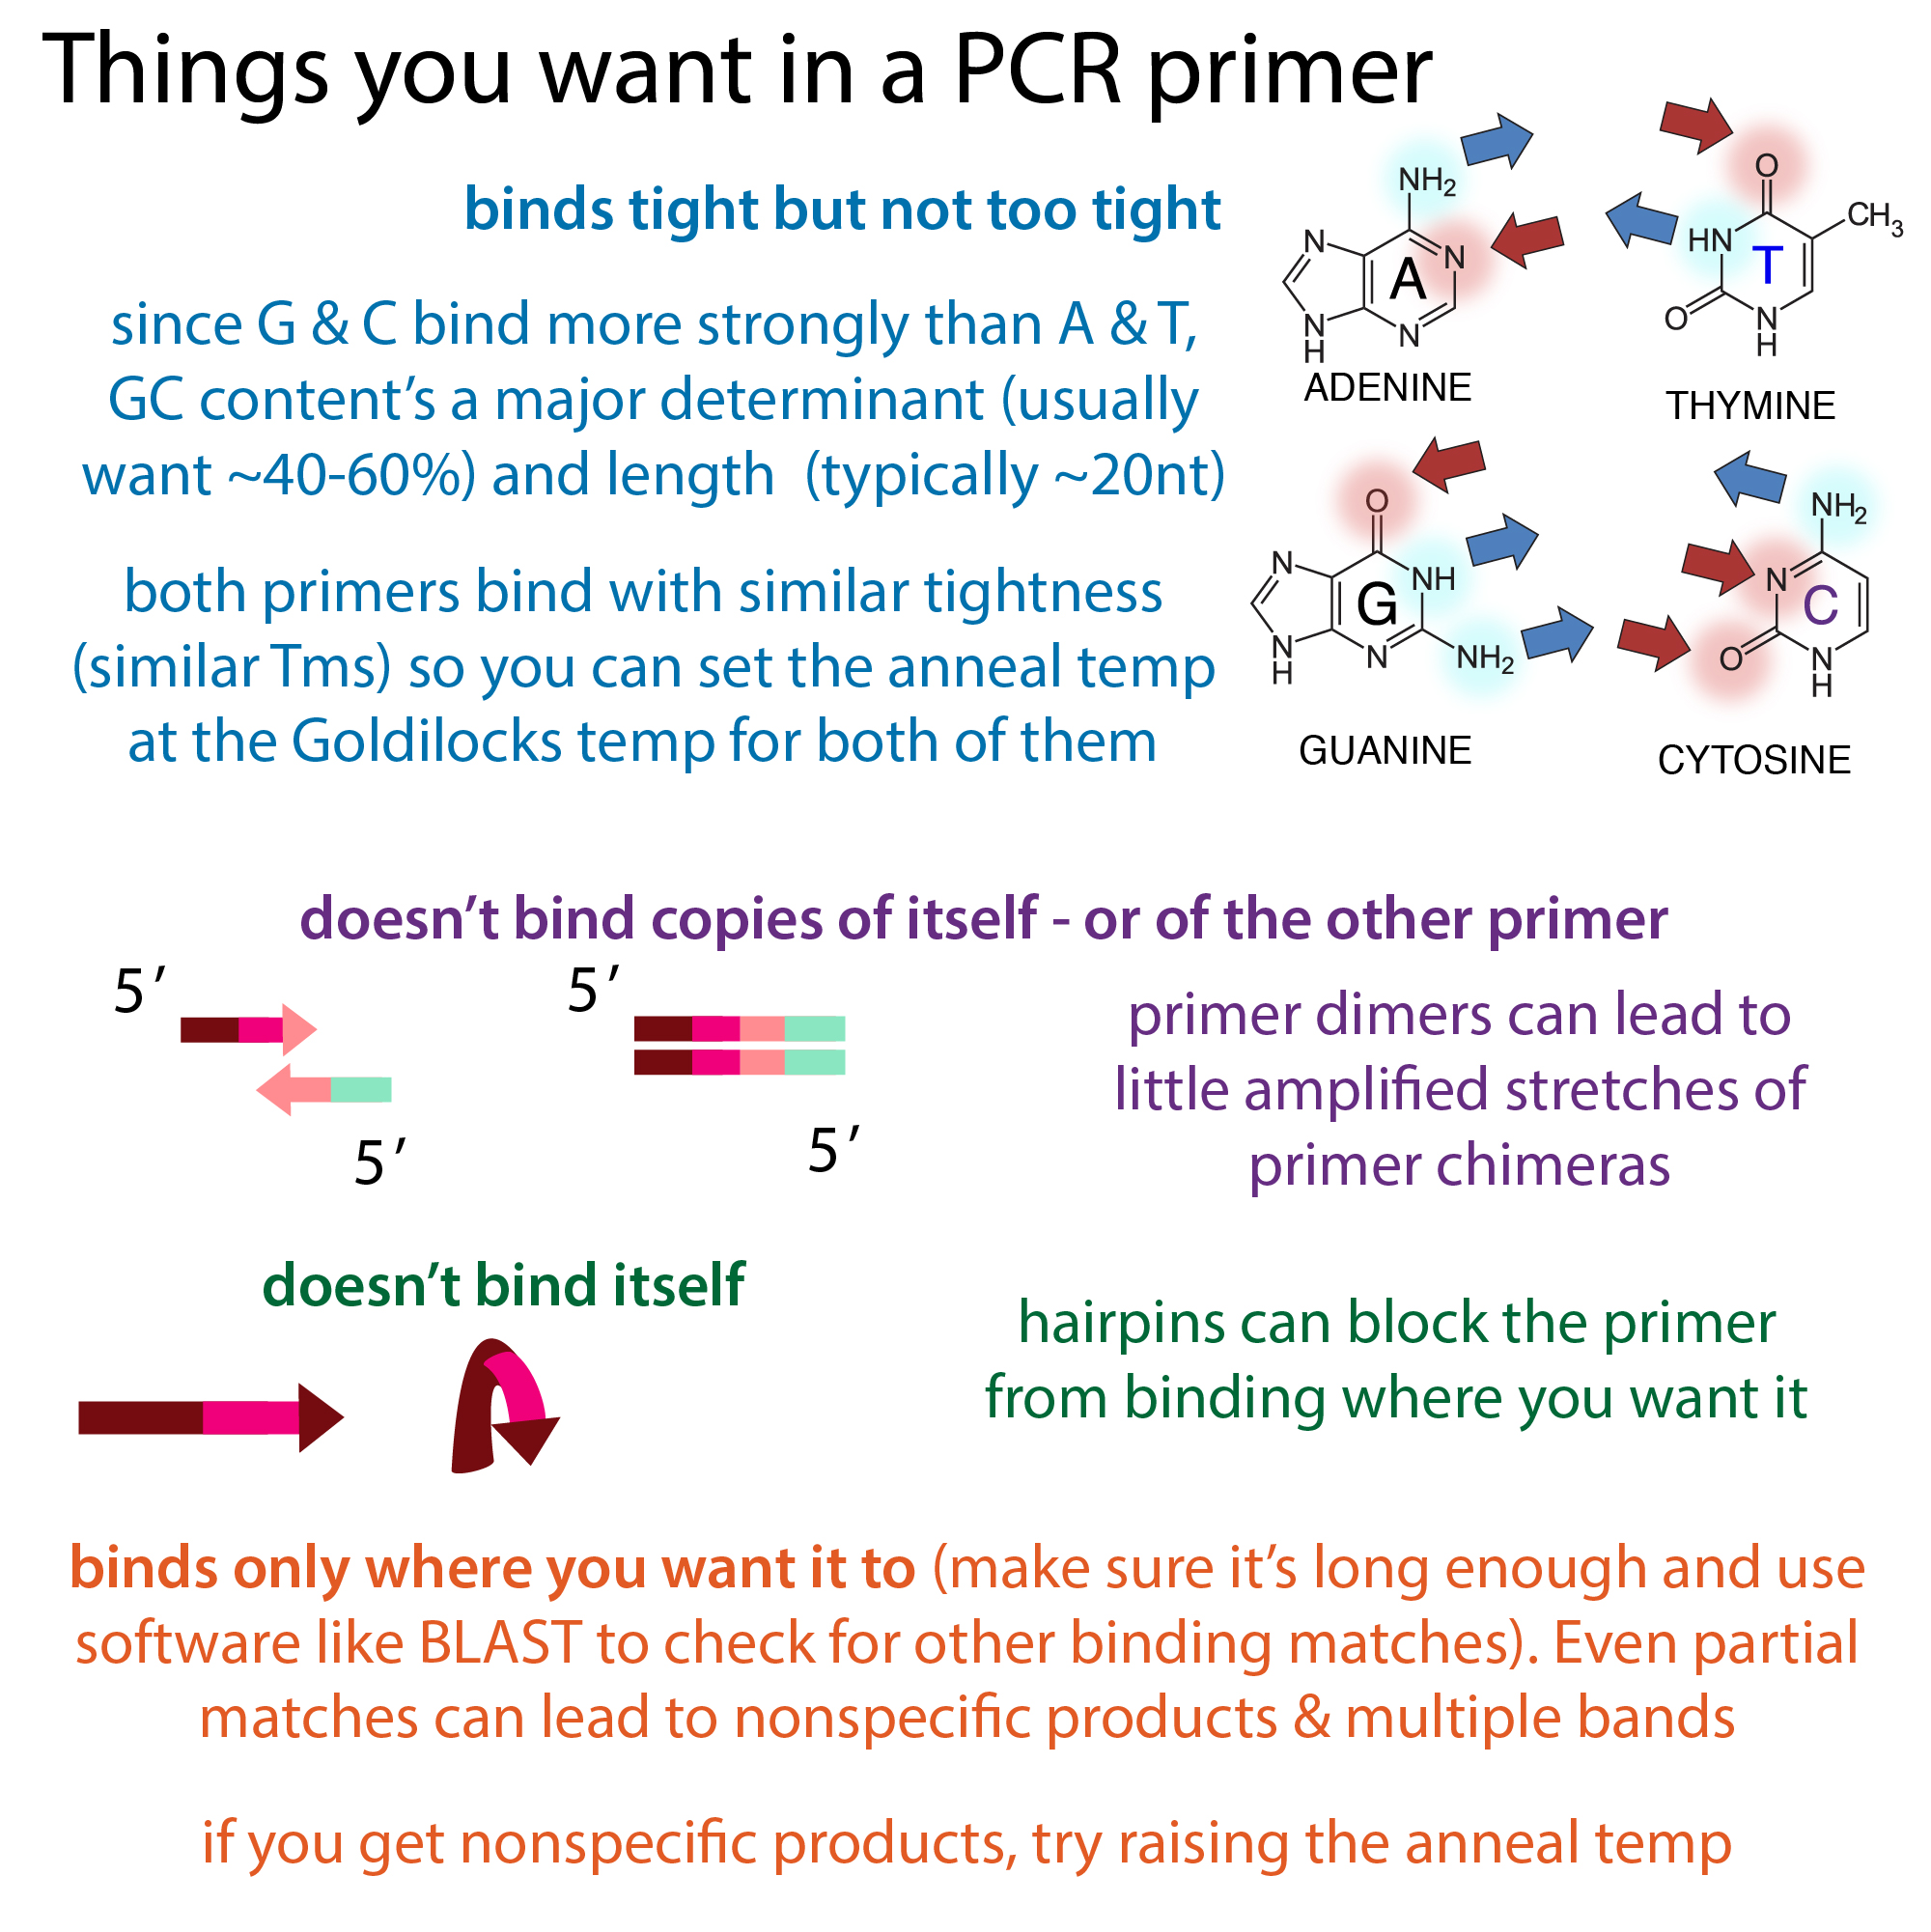
Melting temperature (Tm) is a key factor in primer design. It indicates the temperature at which half of the DNA strands are double-helical and half are single-stranded. Aiming for a Tm between 60-64°C is ideal, with no more than a 2°C difference between forward and reverse primers. This ensures proper binding during the PCR cycles.
GC content also plays a significant role. A GC content of 35% to 65%, ideally around 50%, is recommended. High GC content can lead to stronger binding, while low GC content may result in weak interactions. Avoid sequences with four or more consecutive Gs or Cs, as these can create stable secondary structures that hinder the amplification process.
When designing primers for qPCR, target amplicon lengths should be between 70-150 bp. This range supports efficient amplification and allows for precise quantification. When working on multiple targets, designing primers for similar-sized products can improve comparability in multiplex assays.
| Parameter | Recommended Value |
|---|---|
| Melting Temperature (Tm) | 60-64°C, with a maximum difference of 2°C between primers |
| GC Content | 35%-65%, ideally around 50% |
| Amplicon Length | 70-150 bp |
Tools for Primer Design
 Credits: premierbiosoft.com
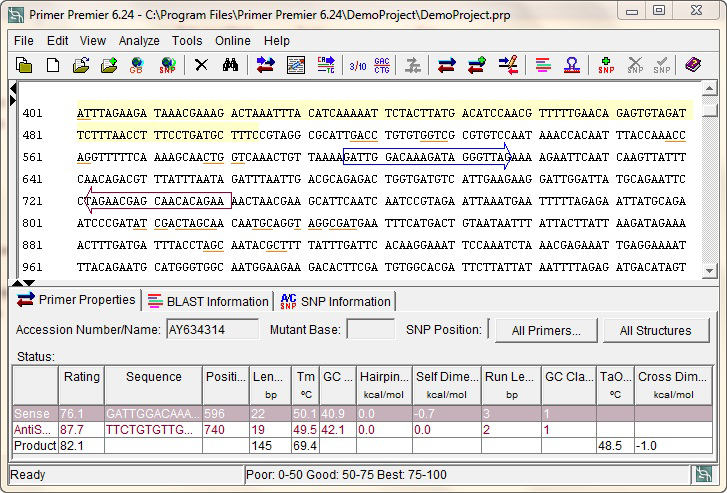
Several online tools can assist in designing effective primers. One popular option is *NCBI Primer-BLAST, which allows users to input target sequences and design primers while checking their specificity against a desired genome. This ensures that the primers are tailored to the intended target without amplifying non-specific sequences. Another useful tool is the IDT OligoAnalyzer, which evaluates melting temperatures, potential secondary structures, and dimer formation to ensure your primers are optimized for the PCR process. This tool helps identify potential issues in primer design, such as hairpins or dimers that can hinder amplification. Additionally, Tebubio Primer Design Tools* assist in specific primer design and validation against mRNA variants from the NCBI Gene page, making it easier to find suitable primers for different applications. Using these tools can significantly enhance the reliability and efficiency of your qPCR experiments.
Avoiding Common Pitfalls
When designing primers for qPCR, it’s crucial to avoid common pitfalls that can lead to ineffective amplification. One major issue is the formation of secondary structures. Primers can sometimes fold back on themselves to create hairpin loops or bind to each other, forming dimers. These structures can prevent the primers from binding to the target DNA, significantly lowering the amplification efficiency. To avoid this, use tools like the OligoAnalyzer to check for these potential issues before finalizing your primer design.
Another important aspect is specificity. It’s vital to ensure that your primers are unique to the target sequence. Performing a BLAST analysis can help confirm that the designed primers do not amplify unintended sequences. This step is essential for obtaining accurate quantitative results, as non-specific amplification can introduce variability in your data.
Additionally, consider the impact of primer design on the efficiency of the reaction. If your primers are too close together or if they span large distances, it can hinder the amplification process. Aim for a balanced design that allows for efficient binding and amplification, which is critical for reliable qPCR results.
Practical Tips for Successful Primer Testing
To ensure your primers perform well, start by validating them through experimental testing. This includes measuring amplification efficiency and specificity, which can be assessed using melting curve analysis and gel electrophoresis. For instance, if your primers amplify a single band of the expected size on a gel, this indicates successful amplification.
Another important tip is to consider designing primers that span exon-exon junctions, especially when working with eukaryotic genes. This approach helps avoid amplifying genomic DNA, which can lead to inaccurate results in gene expression studies. By ensuring your primers are specific to mRNA, you enhance the reliability of your quantification.
Additionally, always run a no-template control (NTC) alongside your experimental samples. This control helps identify any non-specific amplification or contamination. If you see signals in the NTC, it indicates that your primers may be binding non-specifically or that there is contamination in your reagents.
Finally, keep a detailed log of your primer designs, testing conditions, and results. This documentation can be invaluable for troubleshooting and refining your future experiments.
- Use gradient PCR to determine optimal annealing temperatures
- Verify primer specificity using BLAST
- Check for potential primer-dimer formation
- Optimize template concentration for best results
- Include controls in your experiments to validate primer efficiency
- Regularly update and maintain your primer database
- Document all testing conditions and outcomes for future reference
Experimental Validation of Primer Designs
Once the primers are designed, experimental validation is crucial to ensure their effectiveness in real qPCR experiments. This validation process typically involves several key steps. First, perform a serial dilution of a known template to create a standard curve. This allows you to assess the amplification efficiency of the primers. Ideally, you want an efficiency between 90% and 110%, which indicates that the primers are working well in the qPCR setup.
After running the qPCR, analyze the data by generating a melting curve. A single, sharp peak in the melting curve indicates specific amplification of the target, while multiple peaks suggest non-specific products or primer-dimers. Additionally, gel electrophoresis can be used to visualize the amplicons. This step can confirm that the expected size of the amplified product matches your design.
It’s also important to test the primers across different sample types, as variations in template quality or concentration can affect performance. For instance, if you’re quantifying gene expression in different tissues, ensure that the primers perform consistently across all samples. By rigorously validating your primer designs, you can confidently move forward in your qPCR experiments, knowing that your results will be reliable.
Frequently Asked Questions
1. What is the purpose of designing qPCR primers?
The purpose of designing qPCR primers is to create specific sequences that will initiate the DNA replication process in quantitative PCR (qPCR), allowing us to measure the amount of DNA in a sample.
2. How do I choose the right length for my qPCR primers?
Ideally, qPCR primers should be 18 to 25 nucleotides long. This length is usually optimal for specificity and efficiency in the amplification process.
3. What are some common mistakes to avoid when designing qPCR primers?
Common mistakes include using primers that are too similar to each other, having high GC content, or not checking for secondary structures that might interfere with the reaction.
4. How important is it to check the melting temperature (Tm) of my primers?
Checking the melting temperature (Tm) is very important because primers with similar Tm values will bind effectively to the target DNA during qPCR, ensuring accurate and consistent results.
5. Can I use software tools for designing qPCR primers?
Yes, there are many software tools available that can help you design qPCR primers by analyzing sequences, predicting Tm, and checking for potential issues like hairpins or dimers.
TL;DR This article covers essential techniques for designing primers for qPCR, focusing on understanding primer basics, key design considerations like melting temperature and GC content, and tools for primer design. It also highlights avoiding common pitfalls such as secondary structures and specificity issues. Practical tips for validating primers and considering intron-spanning are provided, emphasizing the importance of reliable primer design for accurate quantitative results.

