Adobe Illustrator is an essential tool for designers to create visually appealing graphics. Changing the orientation of your artboard from portrait to landscape can really make a difference in your designs. To do this easily, you can use the Artboard Tool. Start by opening your document, then select the Artboard Tool by pressing Shift + O or finding it in your toolbar. Click on the artboard you wish to adjust and look on the Properties panel for orientation options. Select landscape, and don’t forget that you can also adjust its size if needed. This straightforward method helps set your layout efficiently!
Understanding Adobe Illustrator Artboards
 Credits: youtube.com
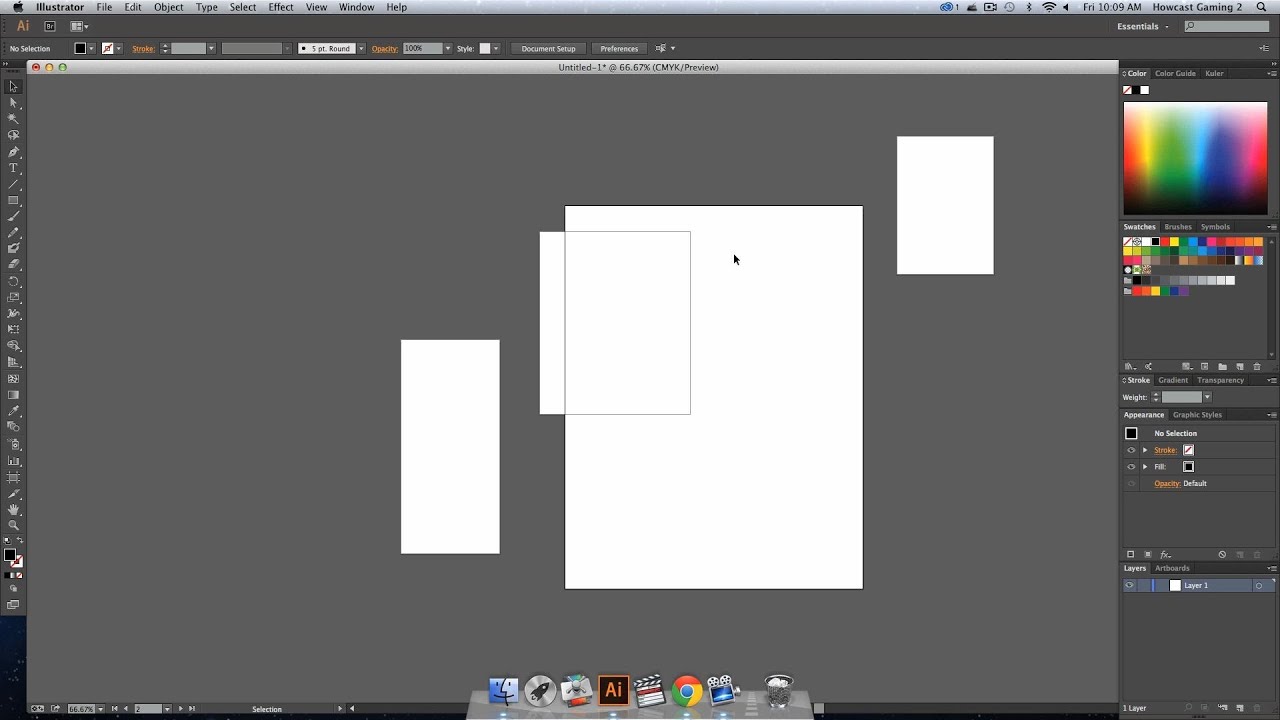
Artboards in Adobe Illustrator are like blank canvases where you can create your designs. Each artboard can have different dimensions and orientations, allowing for flexibility in your projects. For instance, if you’re designing a business card, you might use a portrait orientation, while a landscape layout may be better suited for a website banner or a presentation slide. Understanding how to manipulate these artboards is crucial for optimizing your design process. You can have multiple artboards in a single document, which is helpful for creating variations of a design or different pages of a project. By organizing your artboards effectively, you can streamline your workflow and keep your designs organized.
Why Change Artboard Orientation?
Changing the orientation of your artboard from portrait to landscape is crucial for various design projects. For instance, if you’re creating a banner, landscape orientation allows for a wider layout to accommodate text and images effectively. Similarly, when designing presentations or infographics, a landscape format can help present information more clearly and attractively. Landscape orientation is particularly useful for digital media, where screens are often wider than they are tall. By adjusting the artboard, you not only enhance your design’s visual impact but also ensure that your layout fits the intended medium, be it print or digital. This flexibility can save you time and effort in the long run, allowing for a smoother design process.
- To create a more suitable layout for design elements
- To accommodate wider graphics or images
- To enhance readability for horizontal text
- To match the orientation of printed materials
- To facilitate organization of visual elements
- To improve the overall composition of the artwork
- To align with project specifications or client requests
Method 1: Using the Artboard Tool
 Credits: illustratorhow.com
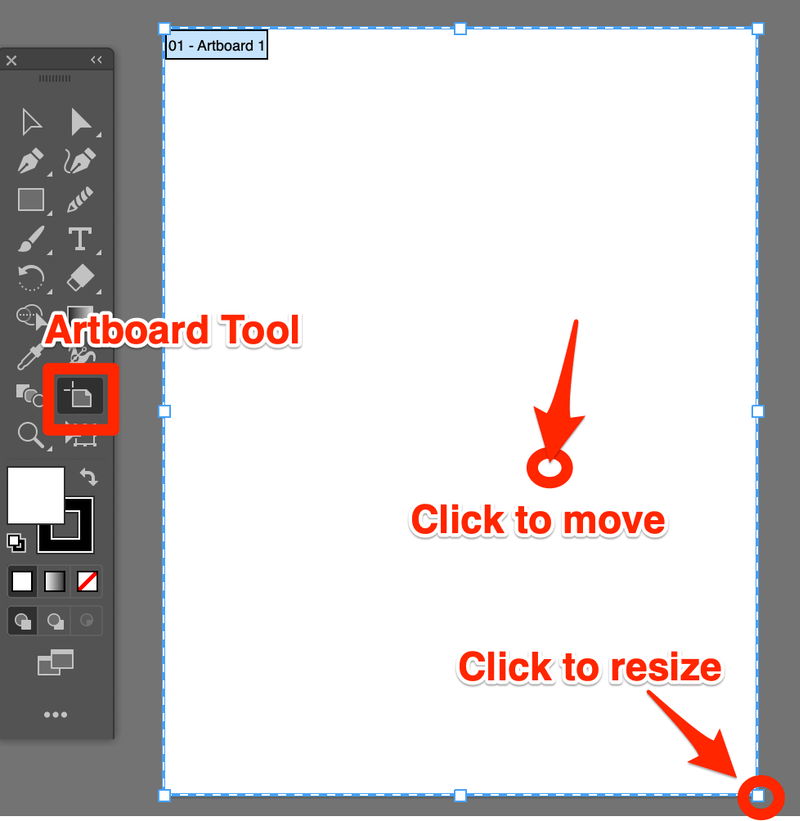
The Artboard Tool allows you to modify the orientation of your artboard directly. To begin, open your document in Adobe Illustrator. Then, select the Artboard Tool by locating it in the toolbar or by pressing Shift + O on your keyboard. Click on the artboard you wish to adjust, which will highlight it. Next, access the Properties panel on the right side of your screen; if it’s not visible, enable it by going to Window > Properties. In the Artboard panel, you will find options for portrait and landscape orientation. Click on landscape to apply the change. If you need to adjust the dimensions of the artboard, you can enter new width and height values in the same panel. Once you’re satisfied with the changes, click outside the artboard area or select another tool to exit the Artboard Tool mode. This method is straightforward and allows you to permanently set your artboard orientation to landscape.
| Step | Description |
|---|---|
| Step 1 | Open Adobe Illustrator and your document. |
| Step 2 | Select the Artboard Tool or press Shift + O. |
| Step 3 | Choose the artboard you want to adjust. |
| Step 4 | Access the Properties Panel under Window > Properties. |
| Step 5 | Change the orientation to landscape in the Artboard panel. |
| Step 6 | Adjust the artboard size if needed. |
| Step 7 | Finalize changes by clicking outside the artboard. |
Step 1: Open Your Document
To begin changing the artboard to landscape in Adobe Illustrator, the first step is to open your document. Launch Adobe Illustrator on your computer and navigate to the File menu in the upper left corner. Click on ‘Open’ and select the document that contains the artboard you want to modify. If you’re starting a new project, you can create a new document by selecting ‘New’ instead and choosing your desired settings. Make sure you have your design file ready, as this will allow you to alter the artboard’s orientation effectively.
Step 2: Select the Artboard Tool
To start changing your artboard to landscape, you will need to select the Artboard Tool. This tool is specifically designed for modifying artboards in Adobe Illustrator. You can quickly access it by locating the icon in the toolbar, which looks like a rectangle with a plus sign, or you can simply press Shift + O on your keyboard. Once selected, click on the artboard you want to adjust. It will become highlighted, indicating that it’s ready for modifications. This step is crucial as it sets the stage for the next adjustments you will make to change the orientation.
Step 3: Choose the Artboard
Once you have selected the Artboard Tool, the next step is to choose the specific artboard you want to change. If your document contains multiple artboards, simply click on the one you wish to adjust. It will be highlighted to indicate that it is selected. This is important because any modifications you make to the orientation will only apply to the selected artboard. For example, if you are working on a multi-page project like a brochure, you may want to change just one artboard to landscape for a specific layout, such as a larger image or a wide table. Selecting the right artboard ensures that your adjustments are accurate and tailored to your design needs.
Step 4: Access the Properties Panel
To change the orientation of your artboard, you need to access the Properties panel. This panel provides essential controls for modifying your artboard settings. Look for the Properties panel on the right side of your screen. If you cannot find it, you can enable it by navigating to the top menu and selecting Window > Properties. Once the Properties panel is open, you’ll see various options related to your artboard’s configuration, including orientation settings. This is where you can easily switch between portrait and landscape modes.
Step 5: Change Orientation
In this step, you will change the orientation of your selected artboard to landscape. With the Artboard Tool still active, look at the Properties panel on the right side of your screen. Here, you’ll find options for adjusting the orientation. Simply click on the landscape orientation option to switch your artboard layout. This change will apply immediately, allowing you to start designing in a wider format. If your design requires it, you can also adjust the dimensions of the artboard in this panel. For example, if you are creating a banner, you might set the width to 24 inches and the height to 12 inches.
Step 6: Adjust Artboard Size if Needed
After changing the orientation of your artboard to landscape, you might find that the default dimensions no longer suit your design needs. Adjusting the artboard size is easy and can help ensure that your artwork fits perfectly within the new layout. In the Properties panel, you can enter specific width and height values to customize your artboard. For instance, if you’re designing a landscape brochure, you might set the width to 11 inches and the height to 8.5 inches. Make sure to keep your design elements in mind while resizing to avoid any overlap or misalignment. By fine-tuning the dimensions, you create an optimized workspace that enhances your design process.
Step 7: Finalize Changes
After adjusting the orientation of your artboard to landscape, it’s important to finalize your changes. To do this, simply click anywhere outside the artboard area or select another tool from the toolbar. This action will exit the Artboard Tool mode, ensuring that your new settings are saved. If you’ve made changes to the artboard size or orientation, they will now take effect in your document. Always double-check your design elements to ensure they fit well within the new layout. If any adjustments are necessary, you can easily return to the Artboard Tool to make further refinements.
Method 2: Using the Rotate View Tool
 Credits: pavlovphotography.com
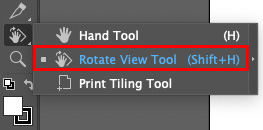
The Rotate View Tool provides a flexible way to explore your artwork from different angles without permanently altering the artboard’s orientation. To start, activate the Rotate View Tool by pressing Command + H on Mac or navigating to it in the Edit Toolbar menu. Once active, click on your artboard and drag your mouse to rotate the view. This is particularly helpful in projects like packaging design or intricate illustrations where you need to examine your work from various perspectives. If you find a specific angle beneficial, you can save this view by going to View > New View, giving it a name, and clicking OK. To revert back to your original view, simply select View > Reset Rotate View, or use the shortcut Shift + Command + 1. Remember, this tool is great for visualization but does not change the artboard’s actual orientation when saving or exporting your project.
Step 1: Activate the Rotate View Tool
To begin using the Rotate View Tool in Adobe Illustrator, you need to activate it. This tool might not be visible in your default toolbar, so you can easily access it by pressing Command + H on a Mac or by navigating through the Edit Toolbar menu. Once activated, you can click on your artboard and drag your mouse to rotate the view to your desired angle. This feature is particularly handy when you want to examine your artwork from different perspectives without altering the actual orientation of the artboard itself. For example, if you are working on a complex illustration, rotating the view can help you see details that might be overlooked in the standard view.
Step 2: Rotate Your View
Using the Rotate View Tool is a great way to temporarily adjust the way you see your artwork without making permanent changes to your artboard. To start, activate the Rotate View Tool by pressing Command + H on a Mac or finding it in the Edit Toolbar. Once activated, click on your artboard and drag to rotate the view. This allows you to look at your design from different angles, which can be particularly helpful for intricate details or packaging designs. If you find a specific angle that you like, you can save this view by going to View > New View, naming it, and clicking OK. When you want to return to the original perspective, simply go to View > Reset Rotate View**** (Shift + Command + 1). Remember that this method only changes your view and does not affect the actual orientation of the artboard when saving or exporting your work.
Step 3: Save a Specific View (Optional)
If you want to save a specific view angle while using the Rotate View Tool, it’s quite simple. Just go to the top menu and click on View > New View. You can then name your view, which makes it easier to identify later, and click OK to save it. This feature is handy when you need to refer back to a particular angle for consistency or if you’re collaborating with others who may need to see your work from the same perspective. For example, if you’re designing a complex illustration, saving a specific view can help you maintain focus on intricate details. To return to the original view, just navigate to View > Reset Rotate View (or use Shift + Command + 1). Remember, this action does not alter the actual artboard orientation; it’s simply for your convenience in viewing.
Step 4: Reset View
After you’ve made adjustments using the Rotate View Tool, you may find that you want to return to the original orientation of your artboard. To do this, you can easily reset your view. Navigate to the top menu and click on View, then select *Reset Rotate View. Alternatively, you can use the keyboard shortcut Shift + Command + 1* (on Mac) to quickly revert back to your standard view. This is particularly useful if you’ve been experimenting with different angles and want to refocus on the primary layout of your design. Remember, this action does not affect the actual orientation of your artboard; it merely restores your viewing perspective.
Final Thoughts on Artboard Orientation
Adjusting the orientation of your artboard in Adobe Illustrator can greatly impact your design’s effectiveness and presentation. A landscape orientation is often more suitable for designs that require horizontal space, such as banners, brochures, or wide-format print materials. For instance, if you are creating a flyer for an event, a landscape layout allows you to incorporate more visual elements side by side, providing a clearer view of your content.
Moreover, understanding when to use portrait versus landscape can enhance the overall composition of your designs. If your project involves infographics or presentations, a landscape orientation might help in arranging information more coherently. By mastering these orientation adjustments, you can ensure that your designs not only look great but also communicate your message effectively.
Frequently Asked Questions
1. What does it mean to change the artboard to landscape in Adobe Illustrator?
Changing the artboard to landscape means adjusting its orientation to be wider than it is tall, like how a page looks when turned sideways.
2. How can I access the artboard settings in Adobe Illustrator?
You can find the artboard settings by going to the ‘Window’ menu and selecting ‘Artboards.’ This opens a panel where you can adjust your artboard.
3. Is it possible to change the artboard size after I’ve already started my design?
Yes, you can change the artboard size at any time, even after you’ve added elements to it.
4. Will changing my artboard to landscape affect my artwork?
Changing the artboard to landscape won’t directly change your artwork, but you may need to adjust the design to fit the new layout.
5. Can I have multiple artboards with different orientations in one document?
Yes, you can create multiple artboards in a single document, each with its own orientation, whether it’s portrait or landscape.
TL;DR Learn how to switch your artboard to landscape orientation in Adobe Illustrator through two simple methods: the Artboard Tool for a permanent change and the Rotate View Tool for a temporary adjustment. Follow the step-by-step instructions to enhance your design workflow.

