Adobe Illustrator is a really powerful tool when it comes to vector graphics. Sometimes, you might need to crop images or graphics to get the best look. This guide gives clear step-by-step instructions for cropping effectively, and it includes visuals for easier understanding. The first method involves using the Cropping Tool: Start by opening your file then place an image on the artboard. After selecting the image, click on Crop Image in the Control Panel. Drag the crop marks as needed and click OK when you’re happy with your selection. Alternatively, you can create a non-destructive clipping mask by drawing a shape over your image and selecting both items before making the mask. Following these steps will certainly help improve your design workflow!
1. Opening or Creating a New File in Illustrator
To begin your design work in Adobe Illustrator, you first need to open or create a new file. Start by launching Illustrator on your computer. Once the program is open, you will find options to either open an existing project or create a new one. For a new project, navigate to the top menu and select File, then click on New. A dialog box will appear, allowing you to set your desired dimensions, orientation, and other settings for your new file. Alternatively, if you want to work on an existing design, choose File > Open, and browse your computer to select the file you want to edit. After opening or creating a file, you can proceed to add images or graphics that you wish to crop.
2. Placing an Image on the Artboard
To place an image on your artboard, start by navigating to the top menu and selecting File, then Place. A dialog box will open, allowing you to browse your computer for the desired image file. Once you find the image, click Place. After this, click and drag on the artboard to position the image where you want it to appear. It’s important to ensure that the image is large enough to accommodate the cropping area you plan to define later. You can also hold down the Shift key while dragging to maintain the image’s proportions. If you prefer, you can simply click on the artboard to place the image at its original size.
3. Selecting the Image for Cropping
To begin the cropping process in Illustrator, the first step is to select the image you wish to crop. This is done using the Selection Tool, which is commonly represented by a black arrow in the toolbar. Simply click on the image to highlight it. When selected, you’ll notice bounding boxes appear around the image, indicating that it is ready for editing.
If you have multiple images on your artboard, ensure you click on the specific one you want to crop. You can also hold down the Shift key while clicking to select multiple images if needed. Once the desired image is selected, you are ready to move on to the cropping action.
4. Using the Crop Image Tool
 Credits: meetanders.com
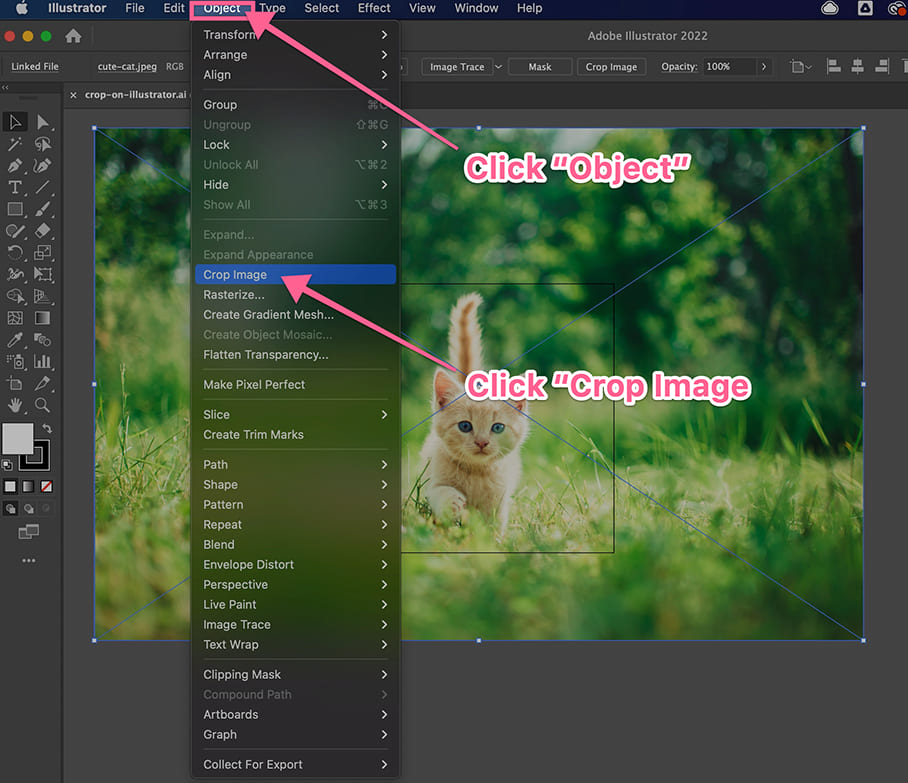
To crop an image in Adobe Illustrator, first ensure that your image is selected. Then, look for the Crop Image button in the Control Panel or Properties panel. Once you click it, crop marks will appear around your image. You can drag these marks inward to define the area you want to keep. Adjust them until you’re satisfied with the selection. When you’re ready, click OK to apply the crop. This method is straightforward and effective for quickly removing unwanted parts of an image.
| Step | Description |
|---|---|
| 1 | Open or Create a File – Launch Adobe Illustrator and create a new file or open an existing one. |
| 2 | Place an Image – Go to File > Place, select your image, and click Place. |
| 3 | Select the Image – Use the Selection Tool to click on the image you want to crop. |
| 4 | Click on Crop Image – In the Control Panel, click the Crop Image button. |
| 5 | Adjust the Crop Marks – Drag the crop marks inwards to define the area you want to keep. |
| 6 | Click OK – Once satisfied with the crop area, click OK to apply the crop. |
5. Adjusting Crop Marks for Precision
After you click on the Crop Image button, you’ll need to fine-tune the crop marks to ensure you capture the exact area you want. The crop marks will appear as dashed lines around your image. To adjust them, simply click and drag the edges of the crop box inward or outward. This allows you to define the area that you want to keep visible. If you’re cropping an image with important details, zoom in on the area to make precise adjustments. For example, if you have a photo of a person, make sure their face is well-framed before finalizing the crop. Once you’re happy with the adjustments, you can apply the crop by clicking the OK button. Remember, this step is crucial for ensuring your final image looks polished and professional.
6. Finalizing the Crop Action
After adjusting the crop marks to your satisfaction, the final step is to confirm the crop. Click the OK button in the Crop Image dialog to apply your changes. Once you do this, the selected area will be cropped, and the unwanted parts of the image will be removed. If you used a clipping mask, you can always edit it later by selecting the mask and repositioning it or resizing it to change which part of the image is visible. Remember, with a clipping mask, the original image remains intact, allowing for flexibility in your design process. If you need to make any adjustments, simply go back to the Layers panel, select the clipping mask, and edit as needed.
7. Creating a Clipping Mask for Non-Destructive Cropping
 Credits: youtube.com
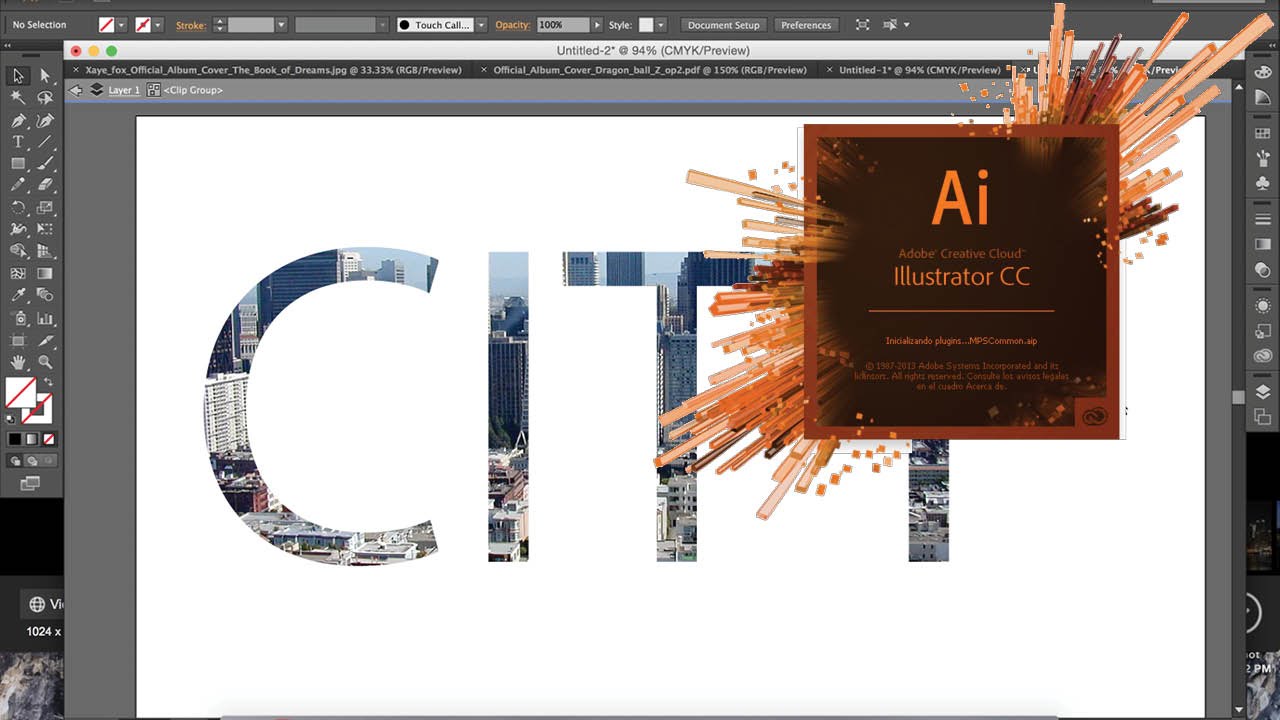
Creating a clipping mask in Illustrator allows you to crop images without permanently altering the original file. This is particularly useful when you want to retain the ability to adjust or change the crop later. Start by drawing a shape over the area of the image you wish to keep. You can use the rectangle tool, ellipse tool, or even the pen tool to create a custom shape. Once your shape is in place, ensure it overlaps the desired area of the image completely. Select both the shape and the image by clicking and dragging over them with the Selection Tool. After both are selected, right-click and choose ‘Make Clipping Mask‘ or navigate to ‘Object’ > ‘Clipping Mask’ > ‘Make’. This will mask the image, showing only the area within the shape you created. The beauty of this method is that you can still move or resize the image within the mask without losing any parts of it. This non-destructive approach allows for flexibility in your design process.
8. Positioning the Clipping Shape
Positioning the clipping shape correctly is crucial for achieving the desired cropped effect. After creating your shape, ensure it covers the exact area of the image you wish to keep. You can move the shape by selecting it with the Selection Tool and dragging it to the desired location. Use the arrow keys for finer adjustments if needed. If your shape isn’t the right size, you can resize it by clicking and dragging the corners while holding the Shift key to maintain its proportions. This precise positioning allows for more control over the final output, ensuring that key elements of the image are included in the clipped area.
9. Selecting Objects for Clipping Mask
To create a clipping mask, the first step is to select the objects you want to include. This typically involves the shape you’ve drawn and the image you want to crop. Use the Selection Tool (black arrow) to click and drag over both the shape and the image. Make sure the shape completely covers the area of the image you wish to retain. This step is crucial because if your shape doesn’t cover the intended area fully, parts of the image may be left out once the clipping mask is created. For example, if you are cropping a photo of a landscape into a circular shape, the circle must completely overlap the desired portion of the landscape. Once both objects are selected, you’re ready to proceed with making the clipping mask.
10. Making the Clipping Mask
To create the clipping mask, ensure both the shape and the image are selected. You can do this by clicking and dragging to make a selection around both objects. Once you have them selected, right-click on the selection and choose ‘Make Clipping Mask‘ from the context menu. Alternatively, you can navigate to the top menu and select ‘Object’ > ‘Clipping Mask’ > ‘Make.’ This action will crop your image to the shape you created, giving you a clean and professional look without permanently altering the original image. The area outside the shape will be hidden, but not deleted, allowing for adjustments later if needed.
11. Additional Tips for Effective Cropping
When cropping in Illustrator, consider using layers effectively. Organizing your images and shapes into layers can help you manage complex designs. This way, you can easily toggle visibility or lock layers to prevent accidental edits.
Use guides to help align your cropping. You can drag guides from the rulers (View > Rulers > Show Rulers) to ensure precision when positioning your shapes or crop marks. This can be particularly helpful in maintaining symmetry and balance in your design.
If you’re working with multiple images, save time by creating a template. Set up a standard cropping shape or size that you can reuse across different projects. This will not only speed up your workflow but also help maintain consistency across your designs.
Additionally, experiment with opacity and blending modes when using clipping masks. This can add depth and creativity to your cropped images, allowing for unique visual effects that can enhance your overall design.
Lastly, don’t hesitate to undo (Ctrl + Z or Command + Z) if you’re not satisfied with your cropping adjustments. Illustrator offers flexibility, so take advantage of it to ensure your final design meets your expectations.
- Use high-resolution images for better quality.
- Always make a copy of the original image before cropping.
- Zoom in for more precise cropping.
- Utilize the Snap to Grid feature for accuracy.
- Experiment with different crop ratios.
- Consider the rule of thirds when cropping.
- Take advantage of the Undo feature if you’re not satisfied with the crop.
12. Keyboard Shortcuts for Quick Actions
Using keyboard shortcuts in Adobe Illustrator can significantly speed up your workflow, especially when cropping images or creating clipping masks. Here are some essential shortcuts to keep in mind:
- Crop Image: To quickly crop an image, after selecting it, you can press
Shift + Ctrl + 7on Windows orShift + Command + 7on Mac. This will initiate the crop tool without needing to navigate through the menus. - Make Clipping Mask: If you prefer non-destructive cropping, use the shortcut
Ctrl + 7(Windows) orCommand + 7(Mac) to create a clipping mask once you have selected both the image and the shape. - Select All: Pressing
Ctrl + A(Windows) orCommand + A(Mac) selects all objects on your artboard, which can be useful when you want to crop multiple images at once. - Undo/Redo: Don’t forget that
Ctrl + Z(Windows) orCommand + Z(Mac) allows you to undo mistakes, whileCtrl + Shift + Z(Windows) orCommand + Shift + Z(Mac) lets you redo actions. This can be helpful if you need to adjust crop marks or clipping masks quickly.
By memorizing these shortcuts, you can enhance your efficiency in cropping and managing your designs.
13. Maintaining Aspect Ratios While Cropping
 Credits: community.adobe.com
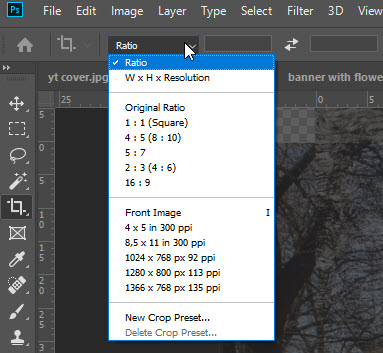
When cropping images or shapes in Illustrator, it’s essential to maintain the aspect ratio to avoid distortion. To do this, hold down the Shift key while dragging the corners of your cropping box. This action constrains the proportions of your crop, ensuring that the width and height scale together uniformly. For example, if you have an image that is 800×600 pixels and you want to crop it to a smaller size, holding Shift while resizing will keep the width and height in the same ratio, like 400×300 pixels. This is especially important for images that will be displayed online or in print, where distortion can ruin the visual appeal.
14. Editing Images in Photoshop from Illustrator
If you need to make more advanced edits to your images after cropping in Illustrator, you can easily edit them in Photoshop. This is particularly useful for tasks that require more intricate adjustments, such as retouching, color correction, or applying filters. To edit an image in Photoshop from Illustrator, follow these steps:
- After cropping or creating a clipping mask, select the image you want to edit.
- In the Control Panel, look for the ‘Edit Original’ button or right-click the image and choose ‘Edit in Photoshop.’ This opens the selected image in Adobe Photoshop.
- Make your desired adjustments in Photoshop using its extensive tools and features.
- Once you’re done, save your changes in Photoshop. The edited image will automatically update in your Illustrator document.
This seamless integration between Illustrator and Photoshop allows you to take advantage of both programs, ensuring your designs look polished and professional.
Frequently Asked Questions
1. What is cropping in Illustrator?
Cropping in Illustrator means cutting out a part of your image or design to focus on a specific area or element.
2. How do I select the area I want to crop in Illustrator?
To select the area to crop, you use the crop tool or the selection tool to create a box around the part you want to keep.
3. Can I crop multiple objects at once in Illustrator?
Yes, you can crop multiple objects by selecting them all together and then using the crop function.
4. Will cropping affect the original image?
No, cropping in Illustrator doesn’t permanently change the original image; it just hides the parts outside the crop area.
5. How do I save my cropped image in Illustrator?
After cropping, you can save your file by going to File, then Save As, and choose the format you want for your cropped image.
TL;DR This guide covers how to crop images in Adobe Illustrator using two methods: the Crop Image tool for direct cropping and Clipping Masks for non-destructive cropping. The process includes opening a file, placing an image, selecting it, adjusting crop marks, and finalizing the crop. For Clipping Masks, you create a shape over the image, select both, and create the mask. Additional tips include non-destructive cropping, keyboard shortcuts, maintaining aspect ratios, and editing images in Photoshop.


